


PAGE INDEX
Core V71 Overview
With no time to waste, let’s take a look around the outside of the Core V71.

The front and rear of the Thermaltake Core V71 chassis (left and right above, respectively) showcase a fresh approach to design as yet unseen among the Thermaltake lineup. While the rear reveals a fairly typical full-tower ATX design (with eight PCI expansion slots), the front can be summed up in one word: mesh. It’s a very sturdy round-hole mesh too, it doesn’t give the impression that it’ll dent or deform easily. It’s really quite striking, and evokes faint memories of the CM 690 (I/II/III) and Rosewill Blackhawk Ultra cases while adding a flavor all its own. There are two external 5.25″ bays available, but they are separated by the internal chassis frame – if you have a bay device that fills more than one 5.25″ bay, you won’t be able to use it with the Core V71. Still, that seems a relatively small price to pay, as all that space means two 200mm fans are hiding just behind that mesh panel (along with a removable dust filter); you’ll have to take notes as to the various other fan configurations (and radiators) that can share that space as well. If you don’t want to skip back to the spec table, the front panel can accommodate up to 3x120mm fans (or 120/240/360/480 radiator), 2x140mm fans (or similar radiator), or the 2x200mm fans that come stock.

That mesh continues unbroken along the top of the Core V71, with only a narrow seam separating the two panels along with a symmetric design for the I/O panel and fan controls up top. A single 200mm exhaust fan fills the space below the top mesh (with room for another 200mm), but there are no shortage of fan/radiator combinations that can fit up here as well. The top panel is actually pretty “deep” – it can house a normal radiator and fan combination above the chassis frame! You’ll need to remove the sliding dust filter to do it, but this chassis will definitely allow for some thick radiators and push/pull fan configurations if desired. The fan mounting points up top are essentially duplicated from the front panel, only offset a bit for motherboard clearance.

The Core V71 is raised a substantial amount off of whatever surface it is placed on by four large feet. The pads on the bottom are more of a foam than a non-skid rubber, but a chassis this large probably won’t be moving around on its own anyway. There should be more than enough room to provide fresh air to any optional intake fans you’d consider placing here (two 120mm fans/240mm radiators are officially supported). Removable dust filters cover both the PSU intake and the optional fan slots up front. The front dust filter will require removal of the front panel though – good thing it snaps on and off with little effort.
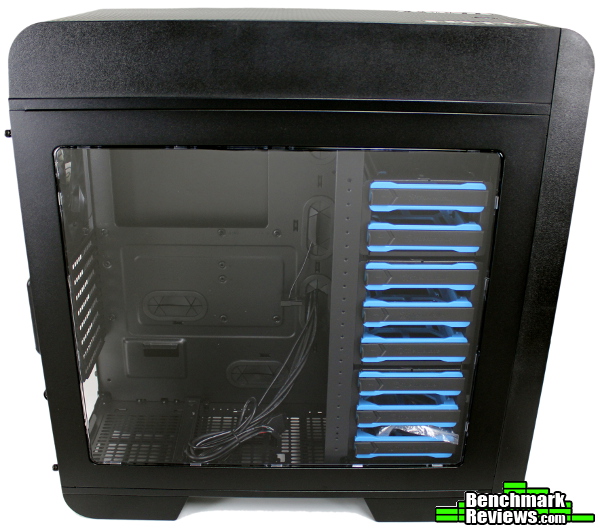
The large side panel window provides a great view of your components. Both side panels are hinged, and attach with captive thumbscrews. That’s a nice touch, as the thumbscrews stay with the panel – no need to set them aside or keep track of them when swapping out drives or devices. Both side panels seem a bit on the thin side, but at least that helps keep the weight down. They’re sturdy enough, so at least you don’t have to battle the chassis to get the thumbscrews to line up when replacing the panel.

Finally, the left (back of motherboard) side is featureless except for an extrusion (about 5 mm) allowing a bit more room for cables.
Most Recent Comments