By Tom Jaskulka
Manufacturer: Gigabyte Technology Co., Ltd.
Product Name: Intel Z87 Chipset Mini ITX Motherboard
Model Number: GA-Z87N-WIFI
UPC: 818313017697
Price As Tested: $134.99 (Newegg | Amazon)
Full Disclosure: The product sample used in this article has been provided by AMD.
The mini-ITX form factor has taken off in a big way. Packing a lot of power in a small space, these 17 x 17 centimeter squares have enabled new concentrations of computing power. Generally, you have to pay quite a bit for the privilege of shrinking everything down, but Gigabyte has a model in their Ultra Durable line of motherboards that brings a “Z” chipset to the ~$130 price point. With high-efficiency MOSFETs and on-board WIFI/Bluetooth, USB 3.0 and two gigabit LAN controllers (Intel and Atheros), the Gigabyte GA-Z87N-WIFI is a reasonably priced entry into the overclocking-capable Z87 chipset. Is it worth it? Follow along as Benchmark Reviews takes a closer look.

First up: a quick overview of the physical board layout; then we’ll dig into the UEFI features and bundled software package. Finally, we’ll see what performance the GA-Z87N-WIFI unlocks using an i5-4670K CPU with a bit of overclocking.
Supports 4th Generation Intel Core processors
Mini ITX Form Factor (17 x 17cm)
GIGABYTE Ultra Durable 4 Plus Technology
Supports Intel Wi-Fi / WIDI technology
Integrated Bluetooth 4.0 and Intel Wi-Fi module
GIGABYTE Hybrid Digital Power Engine
GIGABYTE UEFI DualBIOS
GIGABYTE 333™ Onboard Acceleration (USB 3.0, SATA 3.0 & 3X USB Power)
GIGABYTE On/Off Charge for USB devices
Dual LAN with high ESD Protection
Dual HDMI 1.4, DVI-I
I’ve found that each mini-ITX case seems to have a different idea of where cables are supposed to go, reflecting the relatively new ITX market (compared to the ATX/mATX formats, where the location of the main headers are very predictable). While the products in this segment are definitely maturing, it can still be a toss-up if your particular case meshes nicely with the layout of your particular motherboard. Let’s start with a look at the included accessories, then dig into the physical layout of the GA-Z87N-WIFI.

The accessory bundle is pretty sparse, which is just fine for a product hitting this price point in my opinion. The combo antenna with a magnetic base handles Bluetooth and wireless LAN reception from the included Intel Centrino 2230 mini PCI-express combo card. Two SATA cables join the I/O plate (nicely color coded and labeled), manual and driver discs for the bundled software and wireless card.
The overall layout for Gigabyte’s offering is almost ideal for a mini-ITX board. The Z87N-WIFI pushes all headers and connectors to the periphery of the board, with the only real misstep being the 4-pin ATX_12V connector (incidentally, this connector was pushed to the edge in the Z97 refresh of this motherboard). The USB 3.0 header in the top left might pose a few problems (that cable is usually pretty stiff and hard to route), but there really isn’t a better place for that one anyway. On a case like the BitFenix Prodigy that location is perfect – on a Node 304 you may have to route the cable over components. All headers are nicely labeled, which is greatly appreciated (if you’ve ever had to find a motherboard manual to plug in power/reset switches because you’re swapping cases a year later, you probably know what I mean).
The CPU socket placement is a bit too close to the PCI-Express x16 slot to comfortably fit some of the popular 120mm budget coolers (a logical choice for a nicely-priced overclocking board), potentially restricting cooling options to more expensive All-In-One/water types. I’m a little hesitant to complain too much though, considering that many mini-ITX cases won’t have much room for large tower coolers – even if they do, the smaller volumes common among ITX cases seem to benefit more from all-in-one liquid coolers anyway.

The matte black PCB is even more striking when looking underneath the Z87N-WIFI, and component clearance around the socket area is pretty clear. Many mini-ITX boards have a tendency to get creative under here, so it’s nice to see that most back plates of aftermarket coolers should fit on this board without any issues. The largest IC visible is for the fan speed/monitoring (among other) functions of the UEFI/BIOS, but even this chip should clear most aftermarket back plates.

There aren’t any beefy heatsinks or riser boards for a large number of power phases, but Gigabyte’s high-efficiency MOSFETs (in a 4 phase configuration) should be more than enough for Haswell’s reasonable power demands. I’m a little nervous about pushing a Core i5-4670K too hard without some form of cooling here, but we’ll see how that goes in the overclocking section.

There are four USB 3.0 ports on the rear I/O under the Atheros and Intel Gigabit LAN ports, with twin HDMI and a DVI-I connection available for displays (the GA-Z87N-WIFI supports triple monitor configurations with the on-board video after installing the display driver – until then, only two displays will function). A PS/2 port sits under the only two USB 2.0 ports on the left (top in most cases) side, with a standard audio jack cluster in the usual location. The Realtek ALC892 chip handles the 7.1 surround including the optical out.
The Unified Extensible Firmware Interface has enabled a wide variety of high-resolution layouts. It’s always interesting to see the different manufacturer’s solutions, so let’s look at what Gigabyte has in store for the GA-Z87N-WIFI.

First impressions are definitely pleasing. Most users with 1080p+ monitors will start with the default high-resolution layout shown above (the “Dashboard Mode”), and it does a good job of displaying a snapshot of relevant information. Those users that want the keyboard-focused feel of a BIOS back, just press F2 to switch to Gigabyte’s Classic mode (the same key will again switch back to Dashboard Mode). While there’s certainly something to be said for the efficiency of the keyboard-based BIOS of yesteryear, I think we’re finally at the point where manufacturers have brought a lot to the UEFI interface; Gigabyte’s new UEFI is very pleasing and easy to use.

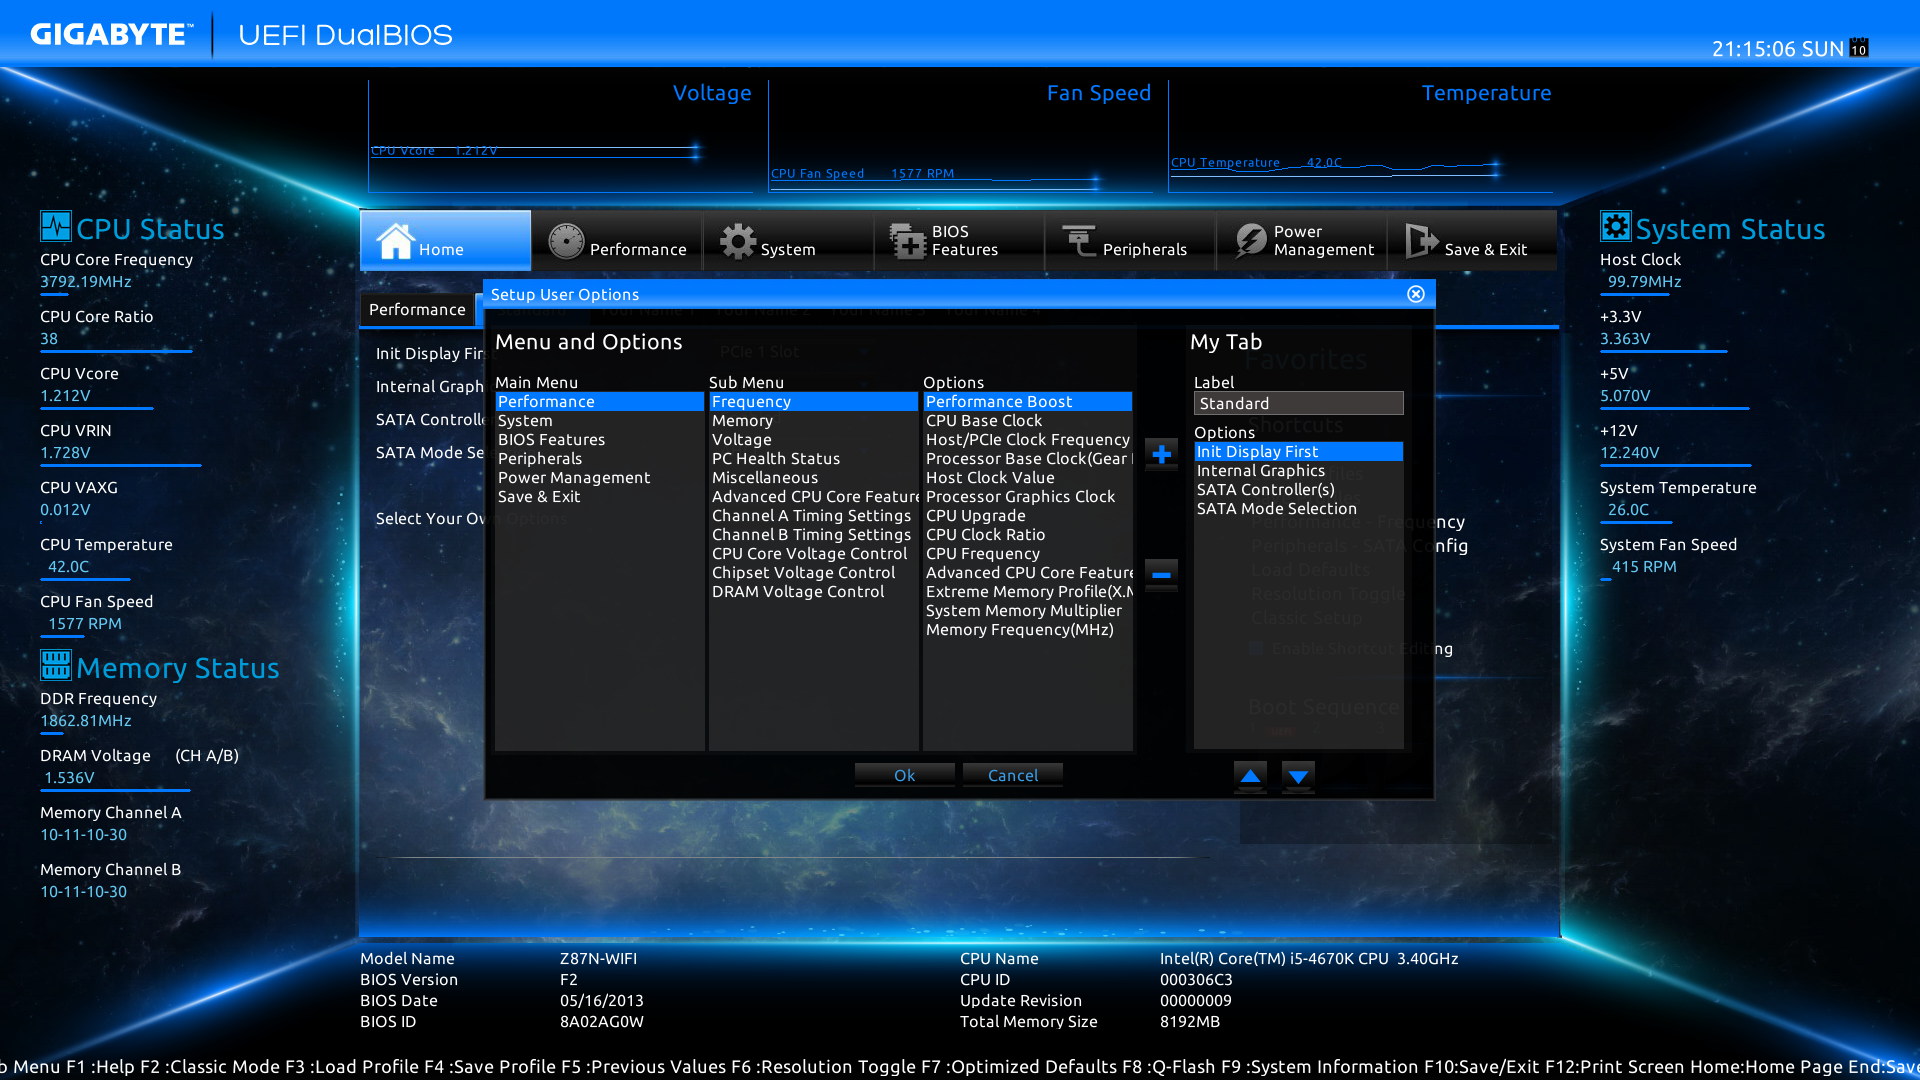
The default screen is the “Home” tab, which consists of a few performance settings and a list of configurable tabs on which one could add their own options/shortcuts. This is really useful for placing those often-used functions right at your fingertips.

Simply click the “Select Your Options” button, and a menu of various options appears. It’s a pretty simple system to set up and use, so you should be able to find a configuration that works well for you.

The Performance tab is where most enthusiasts will probably spend their time. The Frequency sub-tab is where the Clock Ratio sliders, X.M.P. profiles and base clock settings are; memory timings, voltage settings, and temperatures are located on their own respective tabs under the Performance heading.

While it would be nice to adjust the four main memory clocks directly on the Memory tab, you’ll have to drill into one more menu to adjust those manually. At least you can select X.M.P. profiles and change the memory frequency multiplier without leaving this menu.
 The “Z” series boards usually have better voltage controls for overclocking, and the GA-Z87N-WIFI is no different. CPU Vcore, Graphics Voltage, RING voltage, System Agent and the I/O voltages are all configurable here, along with a LoadLine Calibration setting. The PC Health tab shows system temperatures and fan speeds; fan profiles can be configured here too (along with the PWM value for custom slopes). The Misc tab only contains two settings – the PCI-Express Gen3 Slot configuration (set to Auto by default) and the Legacy BenchMark Enhancement (left off/disabled).

The System tab contains most of the initial UEFI settings; the resolution, passwords, display policy (high res, classic, etc.) and even background wallpaper can be adjusted here. I’ll skip the BIOS Features (contains settings for NumLock state, USB support, Intel Virtualization, VT-d, Dynamic Storage Accelerator, OS Type, etc.) and move on to the Peripherals tab, where the SATA and USB settings are located.

Devices and drives are found in this menu. Most users won’t need to tweak much here other than switching off devices they don’t want to use. SATA drives are configured in the appropriate tab along with hot swap/plug options and IDE/AHCI(default)/RAID modes.

The Power Management tab contains the Wake-On-LAN settings and power-back options. The Power Loading option was interesting, and could be useful for some mini-ITX builds. Leaving this set to Auto or Enabled will add a “dummy load” which prevents certain power supplies from powering off if they detect low loads.

Finally, the Save & Exit tab allows you to configure, load, and save profiles. The Q-Flash BIOS update tool is located here as well, and will use a BIOS file on a USB drive to save or update to a new version.
Time for a bit of a confession: normally, I don’t mess with the included drivers or applications when I purchase a new motherboard. After installing the OS, I’ll grab the latest driver versions directly from the manufacturer’s website, then only install a bundled application if I specifically need it to unlock some sort of functionality (fan control, etc.). I just don’t like dealing with the “bloat” of a bunch of extra utilities that I may never use – that being said, it was interesting taking a closer look at what Gigabyte had to offer. Let’s see if there’s anything in here that’s worth the install…

Of course, the first utility you’ll probably encounter is Gigabyte’s Xpress Install, which runs the initial setup of all drivers and applications that are bundled with the GA-Z87N-WIFI. While it’s definitely the fastest way to get up and running I couldn’t find a way to exclude one or two elements (I’m looking at you, Norton…) and still perform a “one-click” express install. Hopefully it’s as easy as clearing the checkbox for each product that you *don’t* want and then using the express install option, but I wasn’t willing to try it (refer to my above comments on bloat – I despise having to go back through and clear out applications later…). Anyway, the drivers and applications were pretty simple to install one at a time using this utility.
APP Center

Gigabyte’s AppCenter is the one utility you will want to be sure gets installed, as it unlocks some of the advanced features most enthusiasts will look for (namely, software based fan control and overclocking with EasyTune). There are additional packages that can be added to this menu, which resides in the system tray and opens on the lower right corner of your screen. Once the number of “add in” applications grows beyond the five listed in the screenshot above, a scroll bar appears to accommodate the others in the list which helps keeps this menu from overtaking the entire screen. The Live Update utility shown on the bottom will always remain visible, as it is the primary utility from which a user can install additional Gigabyte apps and driver updates.
Live Update

Launching Live Update automatically checks for the latest versions of drivers and utilities and includes a handy description for each item. Checking the box in the upper left (top of the list) will stage all items for an update, but you may want to do this from the “All” section.

Clicking on “All” makes adding or updating drivers and Gigabyte applications a simple and easy process. I especially appreciate the short descriptions for each item, which helps give you an idea of what the different applications do – while “Fast Boot” is pretty self explanatory, what about “EZSetup”? Live Update works pretty well, and helps change my opinion on bundled software. On future Gigabyte boards, I’ll definitely be using this utility. My one complaint: if any application fails to install for any reason, Live Update will download it again before attempting to reinstall. It doesn’t keep a temporary cache of downloaded installers, so if you have any trouble with a particular utility you’ll be better off saving the installer from the manufacturer’s product page. (Note: I know the Z97 boards have since been released, along with new versions of these software packages. This very well might have been fixed in an update, but I have not been able to confirm this as of yet. A true fresh install probably won’t run into this issue.)
@BIOS
The @BIOS utility is a simple BIOS updater/installer. I’m apparently a bit old fashioned since I prefer to do these updates offline and from the BIOS itself; it seems Gigabyte might be as well, since this utility commonly fails in a 64-bit OS. Well, at least it did on the Gigabyte AMD boards I’ve used… I ran into numerous issues with this utility updating a Gigabyte Sniper A88X to the latest BIOS, but @BIOS seems to work just fine on the GA-Z87N-WIFI. It certainly simplifies the update process, but it obviously requires an existing Windows installation to function.
EasyTune (+ System Information Viewer)
Unfortunately, I couldn’t get EasyTune to install on my test system – it seems another fresh OS install is in order. Apparently AMD Overdrive or previous EasyTune installations can conflict with the EasyTune installer – to save time, the screenshots from EasyTune and the System Information Viewer are from the GA-Z97N-WIFI refresh model, which is currently hosting a Pentium G3258 Anniversary Edition CPU (some of the frequencies will be different than the i5-4670K used in this article). As far as I can tell, this is the same version of EasyTune as the one used on the GA-Z87N-WIFI.

EasyTune is Gigabyte’s overclocking and fan control software. The Intel chipsets are treated to a drastically better version than the AMD boards I’ve used, and I would imagine this utility would get the most use from enthusiasts out of the entire software suite. A range of presets are available in the “Smart Quick Boost” section, but I’d imagine most users would be much more interested in the Advanced CPU OC portion of the utility.

The Advanced CPU OC section contains Frequency, Voltage and Graphics settings all in one location. You can set and save profiles as well, but this utility needs to be running in order for the settings to take effect (or remember to check the “Retain overclock settings after reboot” box in the preferences menu – only do this once you have a stable overclock!).

The System Information Viewer utility allows a user to set a custom fan curve for both the CPU Fan and System Fan headers. There are presets available in the Smart Fan Auto section (Full Speed, Standard, Performance and Quiet), but more granular control is possible in the Advanced menu (shown in the screenshot). The Calibrate option helps ensure your particular fan is matched up to an optimal workload/fan speed range. System information, alerts, and temp/fan/voltage logging are all available from this utility as well.
Cloud Station
Perhaps one of the most interesting applications bundled with the GA-Z87N-WIFI is Gigabyte’s Cloud Station software. It consists of a few different parts:
- HomeCloud – enables remote access to your machine (think Teamviewer or Splashtop). There are QR codes for Android and Apple platforms, providing easy access to the mobile apps that are necessary to use this function.
- GIGABYTE Remote – probably intended for HTPC applications, this utility allows you to use a touchscreen device (tablet, smartphone) as a wireless keyboard / touchpad.
- Remote OC – essentially what it sounds like: adjust OC settings remotely from a smartphone or tablet.
- AutoGreen – an interesting feature, this utility suspends the PC when a paired bluetooth device leaves bluetooth (10m) range. Sort of a proximity security, in a way. I could imagine this may get a bit annoying in use – you may not want your PC to sleep the moment you step away, but at least locking your machine could be handy (there are Disable, Suspend, Standby and Hibernate settings). It’s too bad it doesn’t turn on the machine when you approach it…
- HotSpot – a fairly typical WIFI sharing app, which allows other devices to use the on-board WIFI to share an internet connection. You’ll need to make sure your wireless NIC allows this feature to enable it.
Miscellaneous
There are other utilities available, usually allowing a user to adjust BIOS settings from within Windows. They range from Fast Boot (configures the fast boot settings in the BIOS), USB Blocker (disables certain USB “profiles” like Mass Storage, Networking, etc.) to Smart TimeLock (set a time limit in hours for computer use, with weekday and weekend settings along with “blackout” times where the machine cannot be used) and Smart Recovery 2 (a simple backup utility that runs on boot and can back up your entire drive to another physical or network location). Some are just a simple portal to BIOS settings, others add some intriguing functionality.
The entire suite may not be for everyone, but the Gigabyte APP Center utility allows you to choose what you want to install anyway. Overall, the blue tones throughout and common design between the utilities make the APP Center a pretty cohesive experience. There were the occasional spelling errors here and there which detracted ever so slightly from the experience, but nothing substantial. The functionality is all there, but a bit more polish and Gigabyte would have one of the better software bundles I’ve used.
On the topic of functionality, let’s get to the testing and see what type of performance the GA-Z87N-WIFI is capable of.
CPU
- Support for Intel Core i7 processors/Intel Core i5 processors/Intel Core i3 processors/Intel Pentium processors/Intel Celeron processors in the LGA1150 package
- L3 cache varies with CPU
(Please refer “CPU Support List” for more information.)
Chipset
- Intel Z87 Express Chipset
Memory
- 2 x DDR3 DIMM sockets supporting up to 16 GB of system memory
* Due to a Windows 32-bit operating system limitation, when more than 4 GB of physical memory is installed, the actual memory size displayed will be less than the size of the physical memory installed. - Dual channel memory architecture
- Support for DDR3 1600/1333 MHz memory modules
- Support for non-ECC memory modules
- Support for Extreme Memory Profile (XMP) memory modules
(Please refer “Memory Support List” for more information.)
Onboard Graphics
Integrated Graphics Processor:
- 1 x DVI-I port, supporting a maximum resolution of 1920×1200
- 2 x HDMI ports, supporting a maximum resolution of 4096 x 2160 @ 24 Hz / 2560 x 1600 @ 60 Hz
* Support for HDMI 1.4a version. - Support for up to 3 displays at the same time
* To set up a triple-display configuration, you must connect a D-Sub monitor using a DVI-to-D-Sub adapter. - Maximum shared memory of 1 GB
Audio
- Realtek ALC892 codec
- High Definition Audio
- 2/4/5.1/7.1-channel
- Support for S/PDIF Out
LAN
- Intel GbE LAN chip (10/100/1000 Mbit)(LAN1)
- Atheros GbE LAN chip (10/100/1000 Mbit)(LAN2)
* Teaming is not supported.
Wireless Communication module
- Wi-Fi 802.11 b/g/n, supporting 2.4 GHz Single-Band
- Bluetooth 4.0, 3.0+HS, 2.1+EDR
Expansion Slots
- 1 x PCI Express x16 slot, running at x16
(The PCIEX16 slot conforms to PCI Express 3.0 standard.) - 1 x mini-PCI Express slot for the wireless communication module
Storage Interface
Chipset:
- 4 x SATA 6Gb/s connectors supporting up to 4 SATA 6Gb/s devices
- Support for RAID 0, RAID 1, RAID 5, and RAID 10
USB
Chipset:
- Up to 4 USB 2.0/1.1 ports (2 ports on the back panel, 2 ports available through the internal USB header)
- Up to 6 USB 3.0/2.0 ports (4 ports on the back panel, 2 ports available through the internal USB header)
Internal I/O Connectors
- 1 x 24-pin ATX main power connector
- 1 x 4-pin ATX 12V power connector
- 4 x SATA 6Gb/s connectors
- 1 x CPU fan header
- 1 x system fan header
- 1 x front panel header
- 1 x front panel audio header
- 1 x USB 3.0/2.0 header
- 1 x USB 2.0/1.1 header
- 1 x serial port header
- 1 x S/PDIF Out header
- 1 x Clear CMOS jumper
Back Panel Connectors
- 1 x PS/2 keyboard/mouse port
- 2 x HDMI ports
- 2 x antenna connectors
- 1 x DVI-I port
- 4 x USB 3.0/2.0 ports
- 2 x USB 2.0/1.1 ports
- 2 x RJ-45 ports
- 1 x optical S/PDIF Out connector
- 5 x audio jacks (Center/Subwoofer Speaker Out, Rear Speaker Out, Line In, Line Out, Mic In)
I/O Controller
- iTE® I/O Controller Chip
H/W Monitoring
- System voltage detection
- CPU/System temperature detection
- CPU/System fan speed detection
- CPU/System fan speed control
* Whether the fan speed control function is supported will depend on the cooler you install.
BIOS
- 2 x 64 Mbit flash
- Use of licensed AMI EFI BIOS
- Support for DualBIOS™
- PnP 1.0a, DMI 2.7, WfM 2.0, SM BIOS 2.7, ACPI 5.0
Unique Features
- Support for Q-Flash
- Support for Xpress Install
- Support for APP Center
* Available applications in APP Center may differ by motherboard model. Supported functions of each application may also differ depending on motherboard specifications.
@BIOS
EasyTune
EZ Setup
Smart TimeLock
USB Blocker - Support for ON/OFF Charge
- Support for Wi-Fi Share
- Support for Cloud Station
Bundle Software
- Norton Internet Security (OEM version)
- Intel Rapid Start Technology
- Intel Smart Connect Technology
- Intel Smart Response Technology
- Intel Wireless Display
Operating System
- Support for Windows 8/7
Form Factor
- Mini-ITX Form Factor; 17.0cm x 17.0cm
Specifications taken from the GIGABYTE product website.
I’ll rely primarily on synthetic testing suites to get an idea of what type of performance this motherboard enables. Obviously, your component choice (CPU + GPU) will have the greatest effect here, but I’ll do a run of PCMark 8 stock and compare it to the best overclock I was able to get using the same components.
Fan control was disabled (leaving fans at 100%), and Intel’s Extreme Tuning Utility was utilized for tweaking. After a quick AIDA64 stress test for stability at the overclocked settings, a few runs of PCMark 8 and 3DMark were in order. PCMark 8 and other CPU tests used just the CPU and integrated graphics – any test with graphics (3DMark, games) used an R9 270X as the discrete graphics card. A stronger GPU would have been a better choice to find out what effect an overclock had on gaming (a Core i5-4670K won’t bottleneck an R9 270X in most games, making these benchmarks primarily GPU limited), but I couldn’t fit any larger GPUs in the Prodigy M enclosure I was using for testing. In any case, it’s the CPU overclock itself that I’m interested in.
(EDIT: Since there didn’t end up being a significant difference in the 3DMark / Unigine benchmark scores (due to the bottleneck imposed by the R9 270X), gaming results aren’t included. If I get a chance to test any of these components with higher resolutions and multiple monitors, I’ll see if I can add benchmarks at that point – really, those results are better suited to the GPU reviews anyway.)
-
Motherboard: GA-Z87N-WIFI Rev 1.1 F2 BIOS
-
System Memory: GSkill Ares 2x4GB set to 1866MHz (10-11-10-30)
-
Processor: Intel Core-i5 4670K
- Cooling: Stock (Stock Intel cooler); Overclock (Swiftech H220)
-
Audio: On-board (Realtek ALC892)
-
Video: Intel HD4600 integrated, R9 270X discrete
-
Disk Drive 1: Samsung EVO 250GB SSD
-
Enclosure: BitFenix Prodigy M
-
PSU: Cooler Master V700
-
Monitor: Acer GD235HZbid 23.5″ 1920x1080p 120Hz LCD
-
Operating System: Windows 7 Ultimate 64-bit
I’ll keep this short – I was pleasantly surprised at my results with overclocking a Core i5-4670K on the GA-Z87N-WIFI. Starting with simple multiplier and voltage bump (leaving most other settings, including LLC, on Auto), I found a nice sweet spot around 4.7 GHz on all cores and 1.27V core voltage. I tried for 4.8; while it would boot to the OS I couldn’t keep it stable during stress tests even with 1.35V. Perhaps with a bit more tweaking higher clock speeds would be possible, but even the Swiftech H220 couldn’t keep core temperatures under 90C at these voltage levels (at 1.27V and 4.7GHz core temps hovered around 75C using the H220).
It turns out I shouldn’t have worried about the VRMs lack of heatsinks. Using an infrared thermometer, the highest temperature I could record around the MOSFETs was about 75C. Generally, these types of ICs are rated for around 100-105C, so…nice work Gigabyte! I guess that “High Efficiency MOSFETs” bullet point wasn’t just marketing speak after all… Of course, this was recorded in a BitFenix Prodigy M case filled to the brim with fans, so adding a discrete GPU or using this board in a case with less airflow might have a different result.
So how much performance can be gained from a 4.7 GHz CPU overclock?

In the synthetic CPU tests, an approximate 23% overclock improved scores by about 15 to 29 percent. Obviously these tests focus on pure CPU performance, with the possible exception of PCMark 8 (although an improvement of 18% and 15% isn’t a disappointment). Not bad for a mini-ITX board, not bad at all.
| Core i5-4670K | Stock 3.4/3.8 Turbo | 4.7 OC | % Improvement |
| Cinebench R15 | 544 | 675 | 24% |
| AIDA64 (Queen) | 34633 | 44736 | 29% |
You’d think at this point in the game I’d learn not to judge products by how they look. I figured without a chunk of metal over the VRMs the GA-Z87N-WIFI would be a mediocre overclocking board at best (you know, because the shape of the heatsink is more essential than the quality of the MOSFET used, right?). I was clearly wrong.
Couple all that with the included software package and wireless/bluetooth functionality, the GA-Z87N-WIFI ends up being a very compelling option for the price. I would imagine the Z97 version would follow suit. I’d like to see the socket move a bit more to the center if possible to enable the use of cheap tower coolers, but…I just can’t complain about much else. A 4.7 GHz overclock on a Haswell Core i5 was far beyond what I thought I’d be able to achieve on this board – some credit may need to go to the CPU itself of course, but obviously the board wasn’t much of a limiting factor. For those users that don’t need the fancy audio or storage options but still want to overclock, the GA-Z87N-WIFI is an excellent choice and a welcome addition to the performance mini-ITX market. Minor layout issues and some WIFI connection problems with the built-in Intel Centrino 2230 (I didn’t really cover this in the article, as it is most likely a driver issue) keep it from being the absolute best option, but I’m willing to bet the Z97 refresh won’t suffer from any of those issues…

I still can’t quite believe how well this board overclocked for me. Performance of a Z-series motherboard, in my mind, centers entirely around its stability and ability to handle unlocked and overclocked i5/i7s – that’s the point of spending extra for this platform. The GA-Z87N-WIFI didn’t have an issue running a Core i5-4670K at 4.7 GHz with 1.27V. That’s pretty impressive for an ITX board with not a lot of space for power delivery.
While it may not look like much, I’m a definite fan of the grey / matte black color scheme. It goes with everything, which is a huge benefit to someone like me that doesn’t know what their favorite color is. I figure the splash of color is better when it comes from RAM, LED fans or the case – any color scheme would work with this board, or you can keep it understated and stick with a monotone theme. I always feel obligated to match a color scheme, so I’m glad Gigabyte stuck with a monotone appearance for the GA-Z87N-WIFI. Those that are absolutely sold on a favorite color may be a bit disappointed, but I feel the appearance of this board is perfect for its category. Remember, you can always spend up and get the G1 gaming version…
The GA-Z87N-WIFI is constructed well, as it should be when it bears Gigabyte’s “Ultra Durable 4 plus” branding. The “2oz Copper” sandwiched between the glass/fabric PCB seems to have really helped keep the board cool, and the Low RDS(on) MOSFETs and solid capacitors seem to be more than capable of handling overclocked voltage loads for the Haswell CPUs. Gold plated CPU sockets. ESD-protected LAN ports and individually fused USB ports fall in this category as well.
Even though it is one of the more barebones Z87 ITX boards, Gigabyte still managed to bring a decent amount of functionality to the platform. Obviously, you get all of the Z chipset goodness (RAID, multiplier overclocking, Intel SRT, etc.) but the added mini-PCIe WIFI/bluetooth combo card and dual gigabit LAN ports makes the GA-Z87N-WIFI able to fulfill a lot of networking roles as well (HTPC, NAS). Some of the features are downgraded a bit (improved audio and Killer NICs belong to the G1 Gaming range anyway), but overall the functionality of this board is right in line with its price and purpose.
The real kicker, in my opinion, is the price. Boards like the Asus P8Z77-I Deluxe kicked off the performance ITX board category, finally enabling some real overclocking abilities in the tiny form factor. However, that board and its successors stayed in the $160-$220 range. Previously you had to pay a lot for the privilege of accessing the “Z” chipsets in ITX form – Gigabyte crashes the party at $134.99 (Newegg | Amazon) and potentially less with mail-in rebates. That is very compelling value, and is one of the best selling points of the GA-Z87N-WIFI.
I feel like I could do more than just recommend the GA-Z87N-WIFI. If it weren’t for a few physical layout issues, the overclocking performance alone would have tempted me to throw a Gold Tachometer award at the GA-Z87N-WIFI. As it is, I think waiting for the Z97 refresh would be in the best interest of anyone shopping for a socket 1150 mini-ITX board, but I’d keep my eye on this model. This is one of those products that I’m glad exists – a solid, no-frills overclocking-capable mini-ITX board at an excellent price.
+ Surprisingly good overclock performance
+ Superb value for mini-ITX / Z87 platform
+ Attractive black/grey color scheme works with every system
+ Earns the “Ultra Durable” moniker
+ Dual Gigabit LAN ports
+ Bundled software package has a few unique and useful utilities without much bloat
– Bundled Intel Centrino 2230 WIFI/Bluetooth combo card was a bit flaky, possibly due to drivers (a replacement wireless AC 3160 card worked perfectly)
– Location of CPU 12V connector could be located in a better spot for cable management
– CPU socket close to PCI-E x16 slot
-
Performance: 9.00
-
Appearance: 8.50
-
Construction: 9.00
-
Functionality: 8.00
-
Value: 9.50


